


TX-CONNECT MP
Vehicle Follow-up
In the vehicle module list view, users can click a column in a data line to open the detail screen of the selected column.
E.g. Click the Activity column to open the activity detail screen on the right:

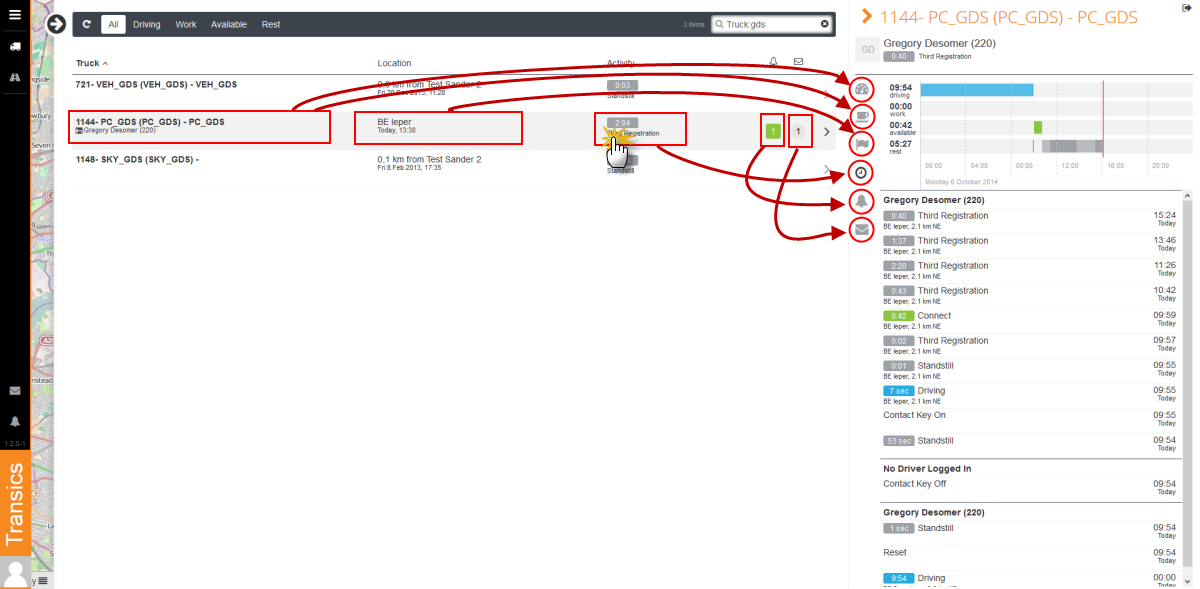
Detail screen overview
|
|
|
|
|
|
|
|
Close Details screen |


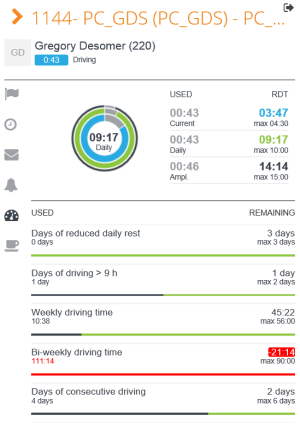
Driving times assistant
|
|
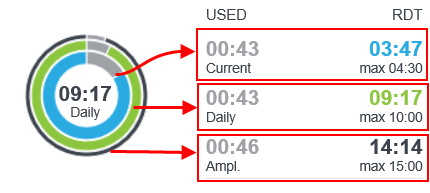
The remaining driving times (4h30 and daily) and the amplitude are displayed in a circle diagram:
|
|
|
|
|
|
|
||
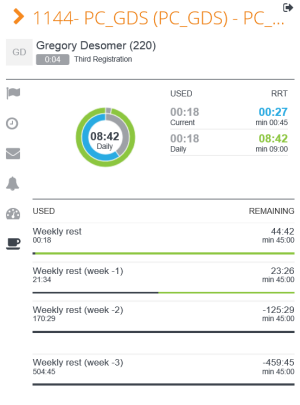
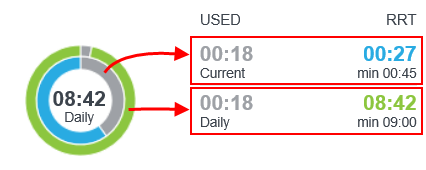
Resting times assistant
|
|
The remaining resting times (current and daily) are displayed in a circle diagram: |
|
|
|
|
|
|
||
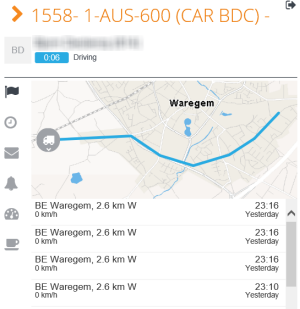
Locations
|
|
Overview of most recent vehicle locations. The map displays the travelled route of the last day. Note: This overview can also be accessed by clicking a vehicle icon on the map in the main screen. |
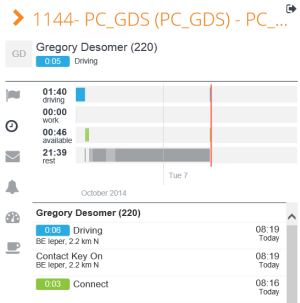
Activities
|
|
Graphical overview of most recent vehicle activities.
List overview of activities per driver. |
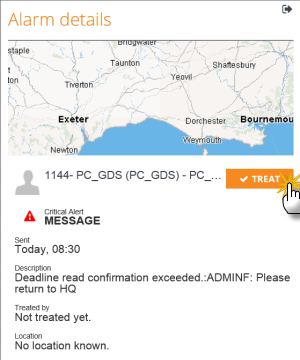
Alarms
|
|
Overview of untreated alarms. Click an alarm from the list to consult the Alarm details: Click
|
||||||||||

 .
. 


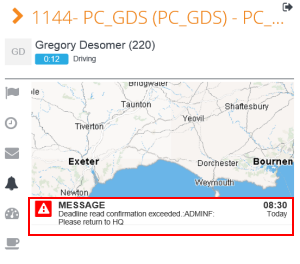
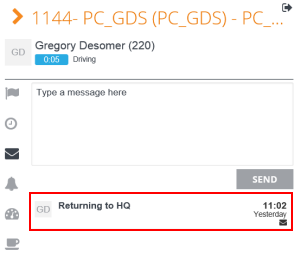
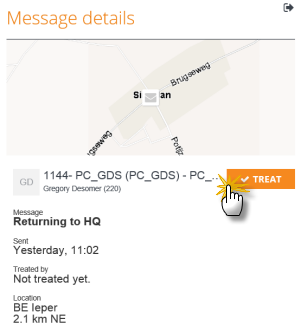
Messages
|
|
Send a message to homebase Overview of untreated messages: Click a message to consult the Message details: Click
|
Next step: Message centre
Previous step: How to use TX-CONNECT MP - Main screen